Here at the Book Printing Company, we understand that many people have limited financial resources, and this is why we have provided this step by step process for creating a cover in word to assist authors in getting their books published. Please see steps below:
Setting up a simple cover in word is possible, however, there are limitations.
As with the internal pages, extra space needs to be added to ensure that you cover design gives you the look that you invision.
Now lets start with the basics. To make this simple we will use an A4 book size with a spine width of 20mm. This example is based on a Perfect Bound book with 3mm bleed and trim.
A cover spread is not possible in word unless you have a great deal of experience in the program, please do not use Microsoft Publisher to create your cover.
You will need three separate documents to create your cover and a printing company who is prepared to lay it out correctly when you're finished. The first is your front Cover, the second is your back Cover and the third is your spine.
The Book Printing Company can layout your cover, however, we do charge a small fee. For Book Printing Company clients, the fee is $50.00 plus gst and for Non Book Printing Company clients, it is $75.0 plus gst. You must inform the printing company that your individual pages have 23mm bleed on all sides.
YOUR FRONT COVER - Perfect Bound
Step 1. If your book size is 210mm wide and 297mm high you will need to create a word document that 23mm larger on all 4 sides. Therefore, your page size will be 256mm wide and 343mm high.
The extra 23mm on all 4 sides will allow for the bleed and trim. Usually only 3mm is required for a perfect bound book, however, if you want to use a background colour or image, you will need the additional 20mm space so that word doesn’t give you a fix margins error.

Pictured above is your A4 page with the extra 23mm on all sides (256mm x 343mm) shown in blue as a guide. The final cover size (eg A4) is shown in white. The blue shaded area will be white in your document.
Step 2. Setting up your page margins to protect your content. As we stated above, the 23mm on all sides will be cut off, so we need to adjust your document or page margins during this process to achieve the best result. The first adjustment will to set your page margins at 20mm on all sides. This will give you an working space of 216mm x 303mm.

Pictured above is the document with the 20mm page margins now shown in red.
Step 3. Now we can insert a background colour or an image. For the purposes of this example, we will place an image. It is the harder option to achieve. A cookbook might be fun.

Pictured above is the image inserted into the word doc. The image size area is 216mm x 303mm and the image must fill the entire area.
Below is an example of the cover as it would look on your book after being trimmed.

Step 4. Now we are getting somewhere. So, the next step is to add the text. To ensure that your text is placed in a safe area and doesn’t get cut off. Now is the time to increase all your margins from 20mm on all sides to 33mm on all sides. The reason for this is so that you can see where the safe zone is to place your text. If you place text too close to the edge of the page, it might get cut off.

Pictured above are the adjusted margins in white so that you can see where to place your text.

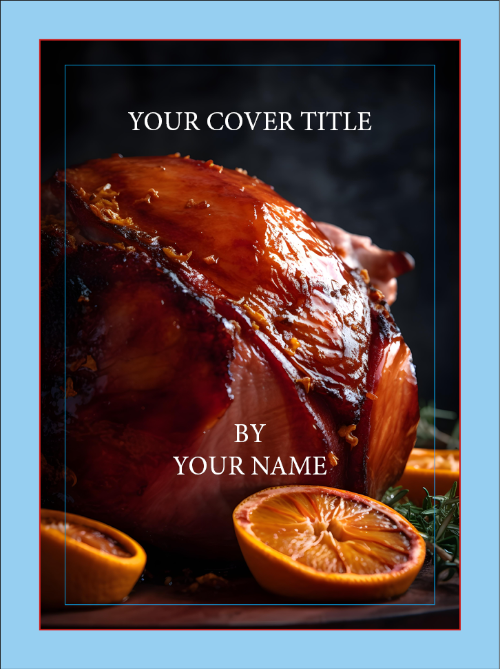
Text added above.

Here is the finished cover. Okay so its needs a bit of work in the design department, however, you get the gist of it.
YOUR BACK COVER
Designing the back cover is the same simple process as the front cover. I have repeated the steps above and used a black background instead of an image.

YOUR SPINE
Now for the spine. The spine setup is a bit different to the covers. The first major difference is that your page will be landscape.
So, let’s go back to the initial measurements. We used a 20mm spine as the example. You will need an accurate spine measurement from the Book Printing Company that you are using. A spine width for a case bound book is larger than a perfect bound book. We have supplied a calculator below to give you the spine width measurements for our paper stocks below.
Step 1. Create a custom page 343mm wide this time and 66mm high (23mm x 2 +20mm for the spine width with 23mm margins.
Step 2. Add your background colour as before. Now you need to increase your margins by an additional 3 – 4mm on all sides. This will leave you with an area to place your text. Because the binding and printing process is subject to slight movement, it requires additional space between the edge of the spine and the text for the best result.

The finished spine is ready for use.
Now you have completed the components. To give you an example of how the cover would look when it is compiled, please see below.
